I was lucky enough to be selected to host a Zatarain's House Party for Mardi Gras. I was already planning on decking out the house, but this gives me more motivation! The first thing I always think about when decorating for anything is a wreath for the front door.
Showing posts with label Crafts. Show all posts
Make a No Sew Apron for Under $5
At school this year, there are items I constantly need. I found the easiest way to manage it all is to use an apron. The teacher I work with already has one that she was sharing with me, but it wraps up around the neck. I wanted one to tie around the waist. I don't pick cute outfits to wear just to cover them up!
Back to School Supplies "Cake"
I can't believe it's already that time of year! My oldest is going into first grade. I've seen supply cakes all over Pinterest, and I decided to tackle one of my own for Jackson's new teacher. I combined a few different ideas into one.
First, I created a colored pencil "vase."
Go Diego Go! Birthday Party
We had the best time at Brady's birthday party. I planned for it to be outside, so of course there was a chance for showers on the day of the big event. We waited until the last possible moment to set up, so I ran out of time to take pictures before our guests arrived. Luckily, Ryan was on photographer duty and did a good job. I'll share the pictures I have and the fun details for our Diego Fiesta!
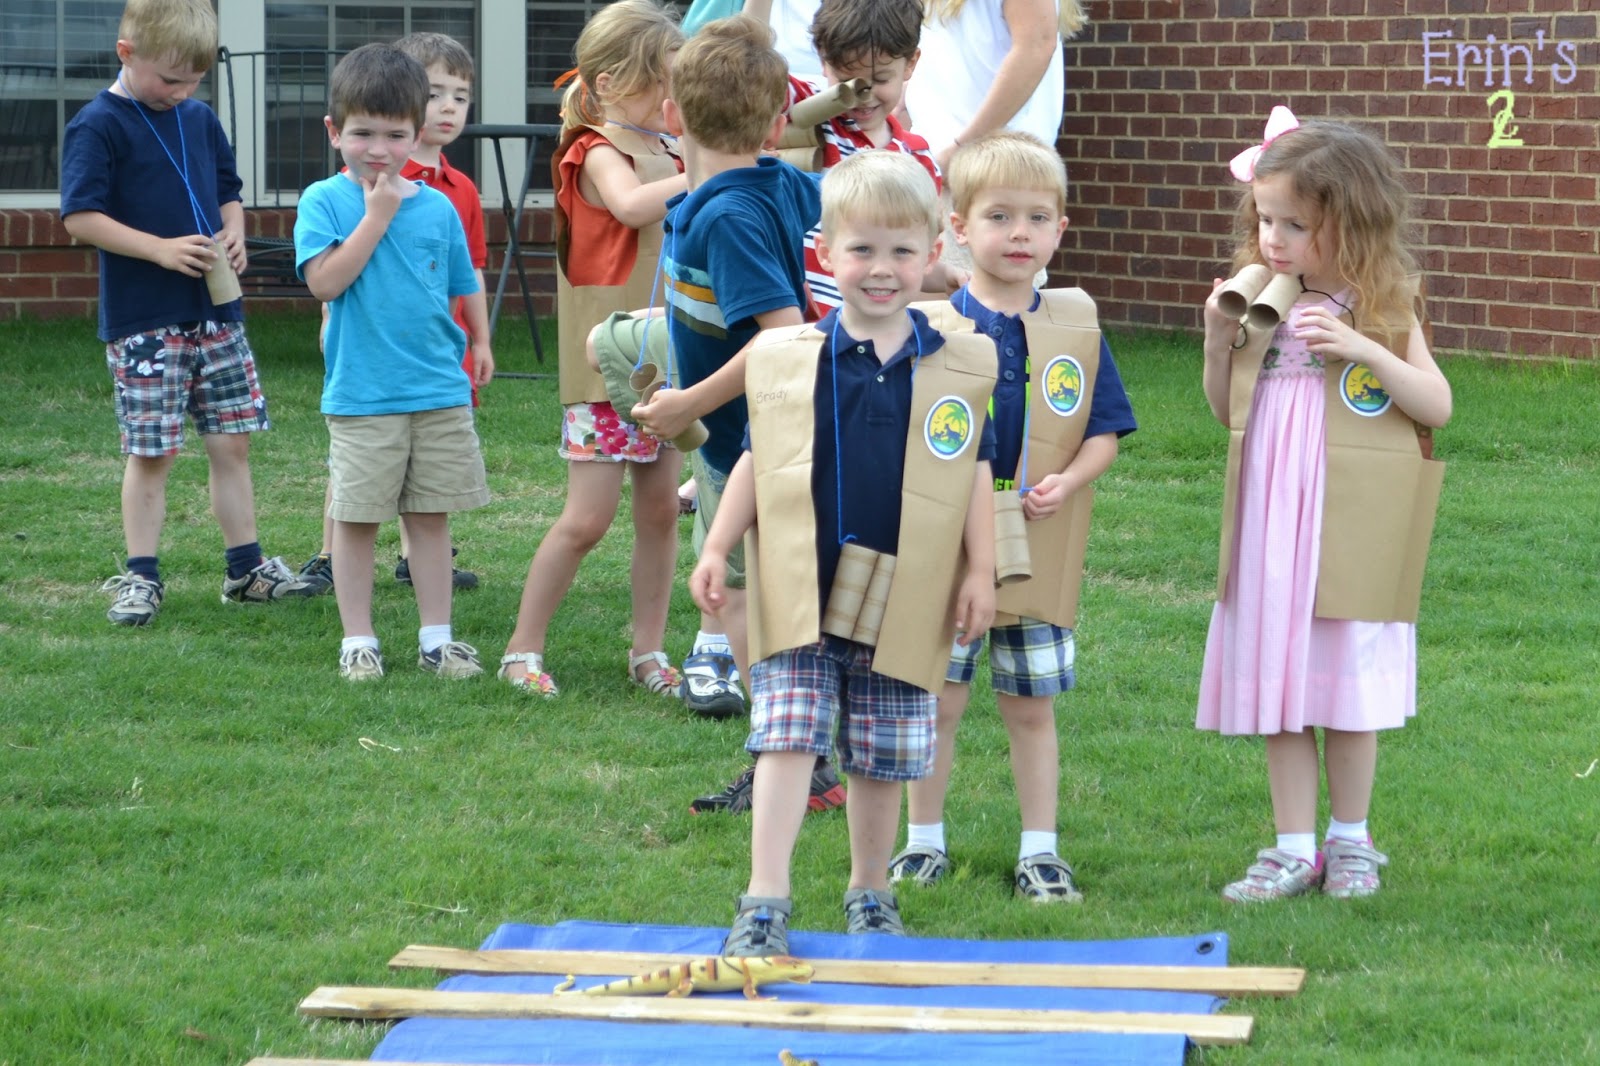
Our budget is tight, so I had to do the best that I could with as little money as possible (which I normally do anyway). The first thing I did was make binoculars out of toilet paper rolls and yarn. I saved the empty rolls from our house and also asked if they could save them for me at work. I hot glued two tubes together and punched holes to tie the string.
I made Diego vests out of paper bags. Publix was nice enough to give me those. I printed the logo from the NickJr.com site. My mom was a huge help with all of the diy projects. So far, my total is $0!
I scoured my favorite place for ideas, Pinterest, and there was a great example for games at Amanda's Parties To Go. I used a tarp and pallet slats to create an alligator swamp and brought home toy alligators from work.
![]() |
| They're lined up and ready to go! |
They had to swing over a pool of quicksand, which was made with paper bags. I delegated the creation of the quicksand to my dad, and his idea was just to throw the pile of bags under the bar! Again, still at $0.
This led them to climb into the Animal Rescue Center (our playhouse), use their binoculars to find trapped butterflies, and go down the slide to save them. The butterflies were "trapped" in the fencing around our vegetable garden. Unfortunately, there are no pictures of this part, because the kids were so excited about catching the butterflies, they did it as they were arriving! I got three nets at the Target dollar bins and the butterflies from the Dollar Tree. The cost is now at $8.
The food and drink spread I kept pretty simple. It was an afternoon party, so I served finger foods. I typically try to keep the food somewhat healthy, since I know they'll be getting their sugar kick with the cake. We had "Baby Jaguar Juice" (lemonade), "Alicia's Apples," "Bobo Brothers' Bananas," and "Animal Rescue" animal crackers. I made little tags for each on cardstock using clipart of each character. For protection, I laminated them. I also served bottles of water with labels that had Baby Jaguar on them. Here's the best picture I could find of the set up.
I'm not sure how much the food cost, because my parents picked it up for me, and my dad has this bad habit of losing the receipt. Can I count that as free? The decorations for the tables included table covers from the Dollar Tree (the paw print on the black table was wrapping paper), a Diego stuffed animal that we found at a yard sale for $4, blow-up trees and animals that I had from my old classroom decorations and the Dollar Tree, and balloons from Party City. That cost me $12, bringing the total up to $20 if you let me count the food as free :)
The cupcakes were from Sam's Club, and they were yummy! Unfortunately, we didn't get a picture of them before we started passing them out. They were really cute with Diego toppers I made with paper punches, toothpicks, and printouts from NickJr.com. I bought the punches, but I don't count those as an expense, since I'll use them for other crafts. The cupcakes were $14, plates and napkins $4, so that's up to $38.
For the favors, I wanted to make Rescue Pack and fill it with goodies. I like to try to find something the kids will actually use once or twice. I know when my kids get home from parties, most of the stuff ends up in the trash pretty quickly. Dollar Tree did it again! They had orange bags that were perfect for Rescue Pack. I printed off the eyebrows, eyes, and mouth using yellow, white, and red card stock. Tacky glue worked the best for attaching them. I found some Diego and Dora stickers and pretty cool bug kits at the Dollar Tree to use as favors. My boys have used ours, so I hope that our guests have found some use of them. The cost of this was hard to calculate, because RSVPing must be seen as unnecessary these days. Each favor cost $2.33. I will be returning the unused products.
Overall, I think the party was a great success, and the kids had a lot of fun. Happy Birthday to my little guy!

Sundays

|
Mondays
|
Tuesdays
|
|
|
|
Wednesdays
|
|
|
|
|
|
|
|
|
|
|
|
|
|
A New Neighbor
I am so thankful the spring weather has finally arrived! Of course, the severe weather alerts will also start tomorrow. In the meantime, the family has been enjoying being outside. We have many projects started that I can't wait to share with you. We have to finish them first!
The boys were helping me in my herb garden and checking on some trees that we planted in the fall, and they discovered that we have some friends who moved in to our yard.
That's right! We finally have a bird's nest in our bird house!! We added the house after having the fence built two years ago and had no luck getting occupants. It doesn't help that we have two wild and crazy boys and dogs running around.
Ryan's dad brought all of the pieces he made after finding a plan online to build the house. He had Jackson help him assemble it while visiting one year. It even has a peeking door!
Now we're waiting for some little eggs to watch over. I hope we haven't already scared the birds away!
Hang on to Those Plastic Eggs!
What to Do With The Christmas Cards?
After Christmas every year, I take down the Christmas cards and look at the beautiful pictures of all of our family and friends. Then I wonder what I should do with them and feel guilty when they end up in the trash. No more guilt this year!
I searched {Pinterest} for ideas, and created a mix of my own. I wanted to keep it short and simple, so I used a chicken ring to collect all of the cards on. I don't know what the technical term is for them, but they are the rings that open and latch back together. They are usually found in the office supply section. Each card got a hole punch in the corner, and then I threaded them on the ring. I made a card out of scrap card stock to add the year.
I took it a little further and included many cards throughout the year. Birth and wedding announcements and special cards from birthdays and holidays seemed to be a great addition to the Christmas cards.
Now we can flip through each year to see how our friends and families have grown and changed. I also made sure to include our Christmas card at the very end so that we can compare them from year to year.
What do you do with your holiday cards?
I hope everyone has a happy and healthy new year! I look forward to sharing more of our projects and strategies for saving with you.
Visit {HERE} to see the link parties where you will most likely find me. Thanks to all of the wonderful hosts!
Or check them out from the links here: The Prudent Pantry, Here Comes the Sun, Jane's Adventures in Dinner, Project: Inspire, Melting Moments, The Artsy Girl Connection, Confessions of an ADD Housewife, The NY Melrose Family, Someday Crafts, The Dedicated House, Adorned From Above, Organize and Decorate Everything, Six Sisters' Stuff, I Heart Nap Time, Positively Splendid, Heatherly Loves, Kayla Creations, Debbiedoo's, A Stroll Thru Life , The Thrifty Home, Beyond the Picket Fence, Stone Gable, Here Comes the Sun, Mom on Timeout
Refurbished Christmas Wreath
I love the beginning of December, because it means I can decorate for Christmas! I love taking out all of the decorations and remembering them from year to year. I also like to see what I collected at yard sales and thrift stores to add to the collection.
This year, I pulled out a wreath that I received in college to hang on my dorm door. It has survived the moves and is still with me. It just isn't exciting me anymore.
Instead of getting rid of it, I decided to give it a makeover! I used red deco mesh, green and gold sparkle ribbon, and gold plastic ball ornaments. The reason I point out plastic is due to the fact that I started with glass balls, and one fell, ending up shattered.
There are multiple videos on the internet showing how to use deco mesh. It is probably a lot easier to search it than for me to try to explain it. I did two layers of the deco mesh to cover the wreath.
I then took the gold and green ribbon and wrapped it around the mesh. You have to play with it until it looks right.
Then, I added the gold balls using ornament hooks to attach them to the mesh. Again, you just have to play around with the placement until you get the right balance.
Now it's big enough to fill the space over my mantle.
Have you made over any wreaths? Add your link in the comments to show off your skills.
Visit {HERE} to see the link parties where you will find me. Thanks to all of the wonderful hosts!
Or check them out from the links here: The Prudent Pantry, Here Comes the Sun, Jane's Adventures in Dinner, Project: Inspire, Melting Moments, The Artsy Girl Connection, Confessions of an ADD Housewife, The NY Melrose Family, Someday Crafts, The Dedicated House, Adorned From Above, Organize and Decorate Everything, Six Sisters' Stuff, I Heart Nap Time, Positively Splendid, Heatherly Loves, Kayla Creations, Debbiedoo's, A Stroll Thru Life , The Thrifty Home, Beyond the Picket Fence, Stone Gable, Here Comes the Sun, Mom on Timeout
Halloween has hit our house!
I've had to make the rule for myself that I wait until about a month before a holiday to decorate. Otherwise, it gets a little out of control. It also gets my boys excited way too early, and then I have to repeatedly explain how long they still have to wait!
Well, it's now October, so I can decorate for Halloween. I already shared my fall decor, and I can easily add a few details to make them more appropriate for the upcoming holiday. It also makes it easy to transition into Thanksgiving afterwards.
My mom stumbled upon Halloween lights for $1 each at Goodwill, so we now have those throughout the house. In the dining room, they are over the window and along the back of the jelly cupboard.
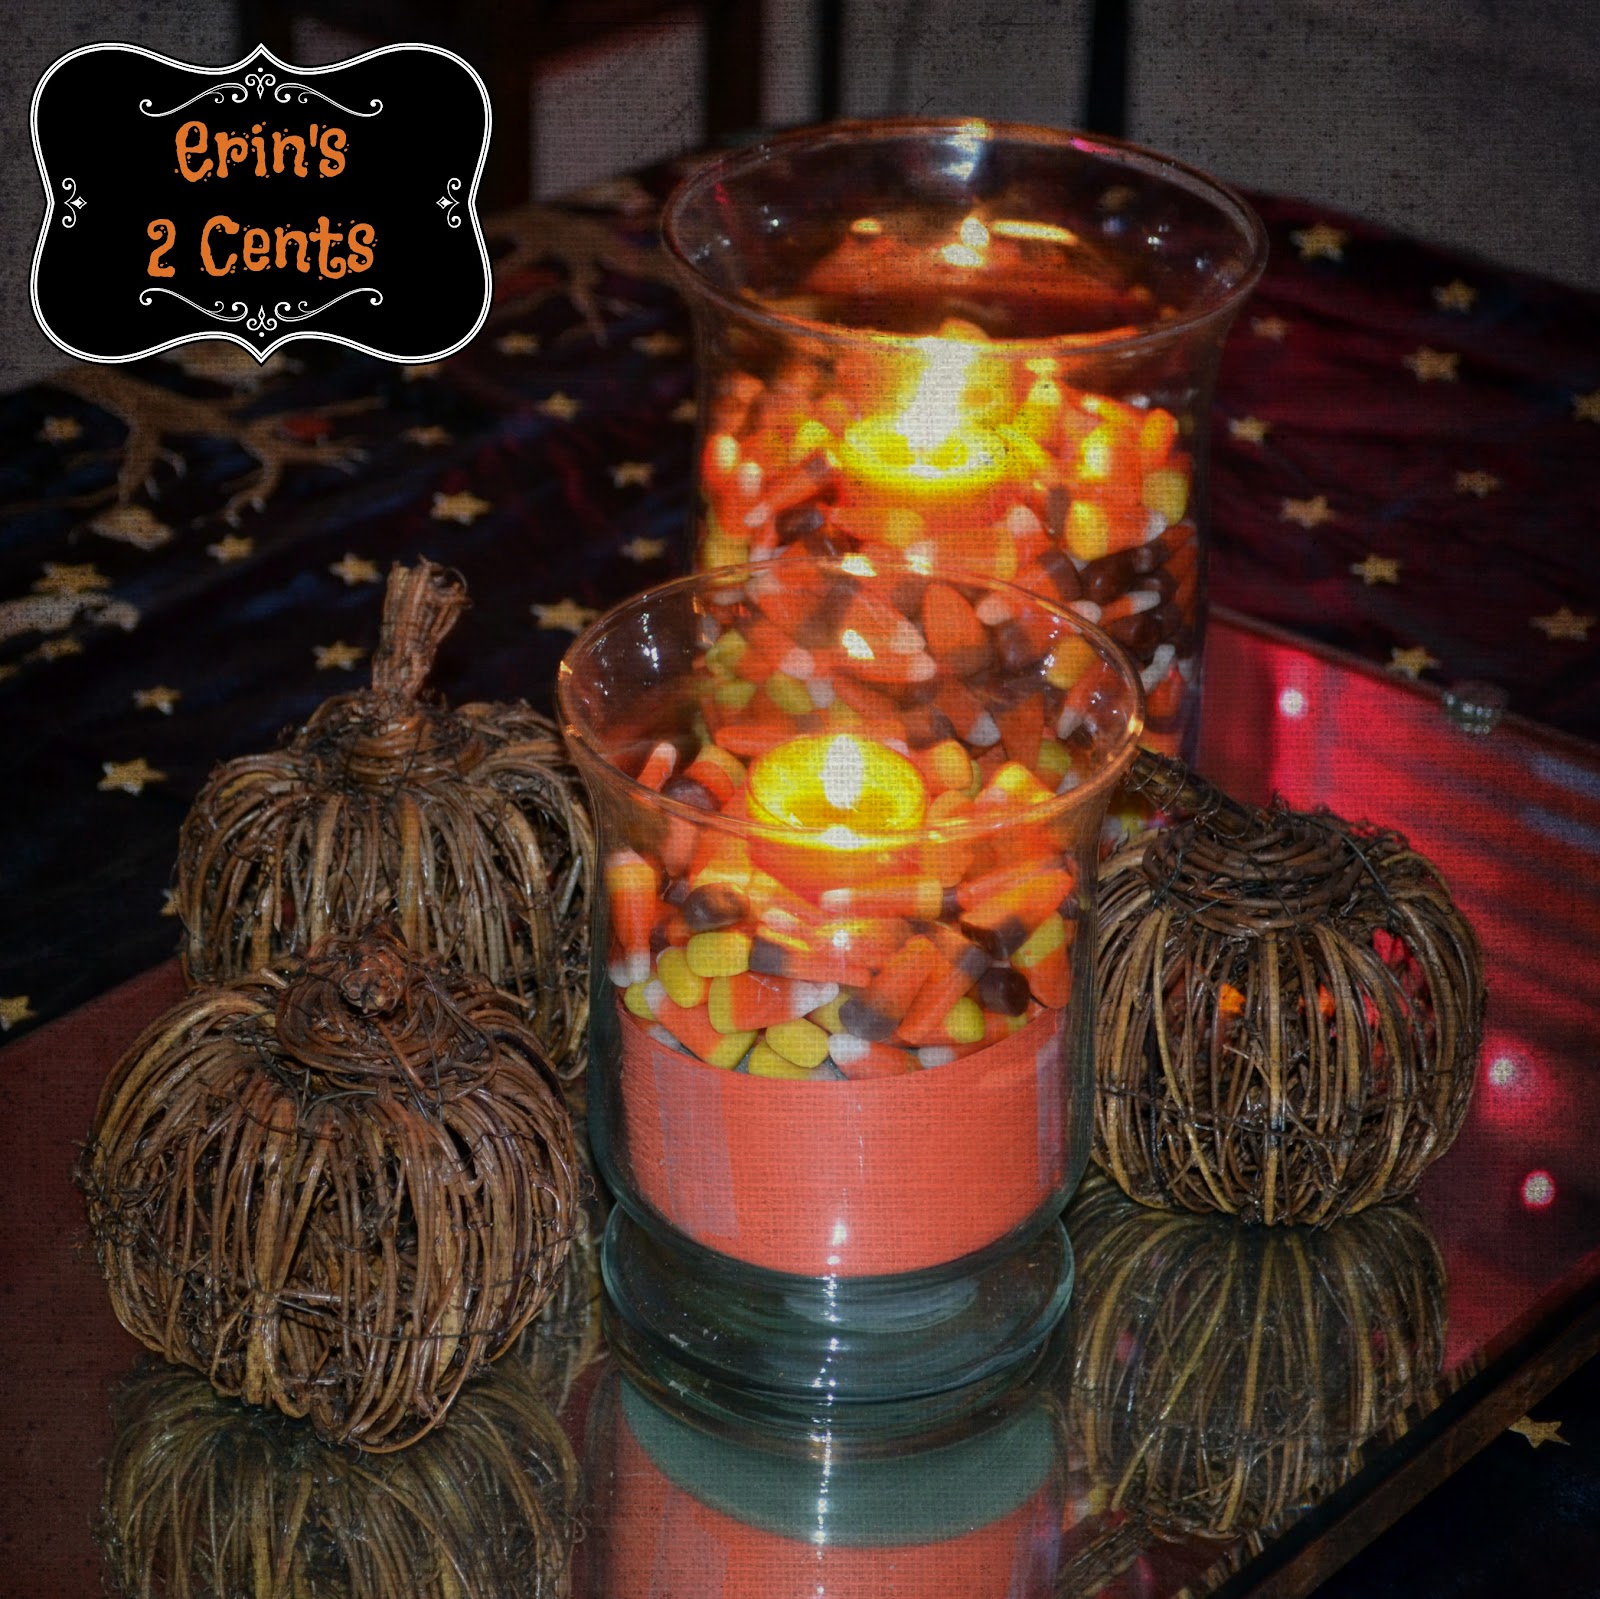
I added a jack o'lantern to the jelly cupboard. On the table, I spread a table cloth and traded out the wine corks in the hurricane glasses for candy corn.
To use less candy corn, I bought the green flower molds to put in the bottom. I was able to squeeze the candy corn around it in the big glass but not in the little one. To solve that, I cut construction paper the width of the block and taped it around. (I realized too late that the tape is showing in the picture. I have since turned the vase around to hide that!) The candy corn covers the green on top. Warning: If you have children like Brady, be prepared to find them planted on top of the table sneaking the candy at 6:30 in the morning!
I also figured out how to avoid dusting the cobwebs off of our light fixtures... add more! My boys had a blast with this. I even got Ryan to help. The bag of webbing came from the Dollar Tree and had 4 spiders with it. We also had some spider rings left from something else, so we put those in there as well. I was really impressed at the amount of webbing that came in the bag. We now have it all over the place.
I'll share the other things we added in upcoming posts. Keep checking back for the spooky additions!
Thanks to all of the wonderful link party hosts!The Prudent Pantry, Here Comes the Sun, Jane's Adventures in Dinner, Project: Inspire, Melting Moments, The Artsy Girl Connection, Confessions of an ADD Housewife, The NY Melrose Family, Someday Crafts, The Dedicated House, Adorned From Above, Organize and Decorate Everything, Six Sisters' Stuff, I Heart Nap Time, Positively Splendid, Heatherly Loves, Kayla Creations, Debbiedoo's, A Stroll Thru Life , The Thrifty Home, Beyond the Picket Fence, Stone Gable, Here Comes the Sun
Subscribe to:
Posts (Atom)