Home About Me Privacy Policy
Showing posts with label Kitchen. Show all posts

Veggie Stir-Fry

This is an easy one!  We had a bunch of vegetables from {Ryan's garden} that we had to use.  I always think that I'm going to get creative and make something fancy.  I wasn't feeling it tonight, so I just chopped, threw it all in a big pan, drizzled olive oil over the veggies and cooked them up.  The vegetables included orange and green bell peppers, cherry tomatoes, okra, and onions.  The onions were the only thing we don't grow.  I added some thyme from {my herb garden} after reading that it pretty much goes with anything.
I served the veggies with baked sweet potatoes, also from Ryan's garden, and marinated chicken.
We quickly learned that okra shouldn't be cooked this way!  Everything else was delicious!!

Herb Garden Update

Summer is in full swing at our house.  I now have my 4-year-old home from preK and my husband home from teaching 6th grade.  This is in addition to already having my 3-year-old at home.  Entertaining 3 boys is exhausting!
We have been busy {yard saling}, visiting {Goodwill}, working on projects, and {gardening}.  Ryan picked his first tomato today!
Here's an update on my herb garden, which is coming in nicely for the most part.  If you missed the post about building it, check it out {here}.
We have really enjoyed the benefits of having this bed in our yard.  We've made tomato basil pizza, used green onions in our tacos, used oregano and parsley in our pasta sauce, and more that I've already forgotten.  I've also been able to make sweet mint tea with the different varieties of mint.  Yum!

If you're interested in the mint tea, here's the recipe for 2 quarts:
1 quart boiling water
1 quart cold water
4 black tea bags (I use whatever I have from {couponing}.)
mint leaves (I use about 10, but choose how strong you want it.  You can pick up mint at a farmers' market or grocery store if you don't have a plant at home.)
1/2 to 3/4 cups sugar depending on your taste
  1. Use a muddler or crush mint leaves and put them in the bottom of a pitcher.
  2. Place tea bags in pitcher.  Pour boiling water into pitcher.
  3. Allow tea to steep.
  4. Pour cold water into pitcher.
  5. Remove bags.  You can strain out the mint leaves, also, but I find the flavor is stronger if you leave them in.
  6. The mint flavor will become stronger as it soaks.

Wine Cork Trivets

My hot glue gun has been working overtime!  I finally got to make wine cork trivets that I've been planning since we lived in Culpeper!
Ryan and I love our wine, and we hate to throw the corks away.  It started with him making a big cork board to hang his dart board from, and we just kept saving them.  We also had other people collecting them to help with that project and then continued to contribute their corks.
We have a wine theme going on in our {kitchen}, so the cork trivets work perfectly.
Ryan had already cut them in half from his previous project.  He even made a holder out of scrap wood to saw them easily!
All I had to do was lay out my design and measure the dimensions.  I then cut out a piece of cardboard to a little smaller than the square I made with the corks, which ended up being 6 1/2 x 6 1/2.  There will be little gaps, so make sure to use the plain brown side of the cardboard if you're recycling from a box.  Or you could paint it to have a fun color show through!
I hot glued the corks in place.  If you cut your cardboard smaller than your final product, make sure to lay out the corks to get the spacing correct for the overhang.

Birthday Breakfast

Brady's birthday night didn't end as well as the day went for him.  We ended up at the ER for staples across a gash we think he got from falling out of his bed while sleeping.  Poor little guy got an extra birthday "surprise."

Hopefully, he will be remembering the better moments of the day, like sprinkle pancakes!  This was a lot of fun!

As usual, I was inspired on {pinterest} by {How Sweet It Is}.  I didn't read the blog first, though, to realize that they had a special recipe. 
I started with regular pancake batter  and just added sprinkles.  This was made from scratch, but I'm sure a mix would work just as well.  (I'm going through a phase where I'm trying to make as many things from scratch as possible.  I want our family to get away from all of the weird ingredients, and for some reason it makes me think it's healthier.)
Then, I just made them up as usual.
I noticed one side showed the sprinkles more than the other, so I made sure to have those face up when I presented them to the boys.
And what could be better than more sprinkles to top off the maple syrup?!
Brady, the birthday boy, and his brother loved them!
If you've missed the other special touches I created for Brady's day, check them out below:
Balloons!
Birthday Morning Surprise
Wrapping Paper
Wrapping Paper
Birthday Wreath
Birthday Wreath
 

Buying Ground Turkey in Bulk

We are members of Costco.  As far as saving money goes, you have to do a little bit of research to make sure you're actually getting a good deal.  Always check the unit prices to see more realistically what you are spending.  Sometimes, with {coupons}, you are able to get a much better deal at a regular grocery store.
One thing I have not been able to find cheaper is ground turkey.  The problem is, it includes 6 pounds.  I used to take the packages and just throw them in the freezer as is.  Each package had over 1 1/2 pounds in it, though.  If a recipe called for 1 pound, I was using extra meat.
I got some quart sized freezer bags and started weighing out the meat to make 1 pound bags.  This took us from using the meat in 4 meals to 6 meals.  It really makes a difference over the long run!
Then, I learned a really good tip from {Moneywise Shopper}.  At one of her classes, she shared that you can cook the meat, and 2 cups equals 1 pound of meat.  Whenever we get our ground turkey at Costco, I plan a meal that we will use it in.  For example, I made {tacos} for dinner when I cooked this batch.
I cook it ALL up at once and measure it out into my bags.  Make sure to label the bags BEFORE you add the meat!  I include that it's cooked and the date.  If you use recipes that call for uncooked meat (like meatballs), leave a few uncooked by measuring them out before adding the rest to the pot.
I realized when editing my photos that I took the picture of the wrong side of the measuring cup!  You can either measure out 700 ml or 2 cups :)
I end up with 5 bags to freeze and one pound for the tacos in this case. 

It still freezes just fine, and whenever a recipe calls for browned meat, it's ready to go once it's defrosted.  If you forget to pull it out for your meal, you can even add the bag to a bowl of water to quickly defrost it.  What a huge time saver!

Our Vegetable Garden

We finished Ryan's vegetable garden this weekend.  Now we get to sit back and watch the veggies grow!
He started by making three raised beds.
Then, they had to be filled with dirt.  If you haven't figured this out yet, I don't like to spend money when I don't have to.  Across the street from us is a nice little dirt pile from the hole they dug for a new house.  It was calling my name!  (Well, Ryan's, and he wasn't too happy about it.)
He still added the good kind of dirt (a.k.a. not free) to make sure that our plants would be successful.
We added tomatoes, peppers, and sweet potatoes.  He still has a whole bed for more plants.  A tip I learned from Ryan: Look for the plants at the store with double stems.  It's usually two plants.

After we did all of the planting, we added fencing around it to keep our dogs and boys out.  Eventually, we plan to get something nice, but this will do for now.
I got the idea to use wine corks and skewers as markers from {My Chic Life}.
I can't wait to be able to pick our first veggies!
What are you planting this year?

Easy Kitchen Decorations

Our kitchen is very open and visible from all parts of our main living area.  It is very important to me to have it looking as complete as possible.  I got this area looking homey pretty quickly with just a few things.
The flowers on the bar were picked from a nature reserve we have down the street.  I love having flowers in my house, but I hate paying for them when I know they will eventually die!
record player, Mickey Mouse Club lunch box, pepper box (my great ancestors include the name Pepper) and scoop, mason jars filled with wine corks, cream cheese box, rolling pin
This is the first time I've had space above my cabinets in the kitchen.  I wanted to do something cute (obviously!) with the area.  I love antiques, so what would be better than old kitchen items?  As I find items, I can add them to the collection.  I pick them up at yard sales, antique shops, etc.
Snow White lunch box, tobacco tin, milk jars, scale
Quite a few of them have come from my grandmother, which makes it even more special.  The milk jars are from Glens Falls, New York, where she grew up, and the scale was my great, great grandmother's.  The Snow White lunch box came from my mom, who collects metal lunch boxes.  Snow White is my favorite Disney princess!  Ryan's mom also sent us some of his old lunch boxes.
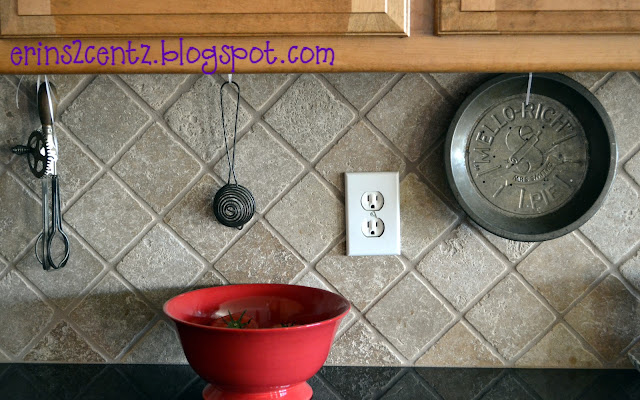
I also hang items under the cabinets that won't prop up on the top.  This is done with small Command hooks placed under the cabinets and some ribbon looped through a hole in the item.
The smaller items I used to make a wreath that's hanging on the door from the kitchen to the back patio.  The items include a rooster cookie cutter, a funnel, a small ladle, a biscuit cutter, and a small egg beater.  I attached them using fishing line so that I wouldn't potentially ruin them with glue.  The ribbon was left over and in my craft materials.  I used a hanging scale to hang it on the door.
 I found a Pepsi tray at a {yard sale}, and this sits on the counter to corral our wine, treats for the boys, and other odds and ends.

I hung this cheese slicer on the wall.  We also have a bit of a wine theme going on in this area, so I thought a cheese related item would fit.  There's a picture of wine glasses in our breakfast area, and I have added corks to some of our decorations.
What easy decorating ideas do you have for making your kitchen an inviting area?

Garden Boxes

Ryan and I have been hard at work while he's home for spring break.  We are building our gardens!  Since we just moved here last year, we haven't done any landscaping.  We did accomplish a huge feat last year with the building of the boys' swing set.
I have a whole list to accomplish, including {Ryan's vegetable garden}, {my herb garden}, a flower garden, mulching around the boys' play area, transplanting bushes from the front, and on and on. 
Because we're on a budget, we have to pick and choose what to do this year.  The most important to me is what can save us money.  That would be Ryan's vegetable garden and my herb garden.  It does cost money up front, but the benefits are wonderful.  At our old house, Ryan was able to can enough tomato sauce and salsa that we never had to buy any from the store for the whole year.  And the best part is knowing exactly where the ingredients came from.
We started at Home Depot.  I found {plans from Ana White Homemaker} that got me started.  She recommended using cedar fence posts instead of the regular cedar boards, and it saves a TON of money.  We borrowed my dad's truck to cart it all home.
Next was building it all.  We are using the boxes to landscape a side yard with a dangerous slope to mow, so it was a little tricky.
We got the hang of it, though, and it took us about half a day if you take out the boys' "help" and nap time.

ready to help!

halfway there

all done with the boxes

We were especially proud of how the side turned out with our ingenious cutting.

The boys cooled off after a hard day with a super soaker battle!
Now all we have to do is fill them with dirt and plant the herbs.  We are also going to eventually add pathways that don't require mowing.  We are also going to put Ryan's vegetable garden together, which should be easier than this project (fingers crossed!).


PDF Print